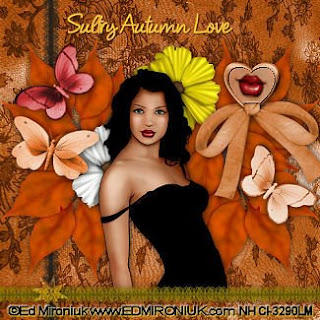
I used PSP 9 to create this tutorial.
There are no plugins needed
Scrapkit Autumn Splendor is by Lippy and can be found here
The tube is by Ed Mironiuk and can be purchased at CILM
Supplies:
Tube of choice
There is a freebie version of this scrapkit at the site
Font is 2Pease Fancy Free
To Begin:
1. Open a 500 x 500 transparent image. Select All
2. Find paper3 in the scrapkit items. Copy and Paste into selection. Selection None.
3. Find your tube and resize it. I did 70% on mine. Copy/Paste. Drop Shadow V & H 1 Op 70 Blur 15. Position the tube in the center. (I will probably be there already)
4. Find the ribbonheart4 item and resize to 30%. Place in the upper right corner. Drop Shadow as above.
5. Close of the Tube and background layer.
6. Return to your original tube and crop out the face or other body area of the tube that you like. Copy. With your magic wand hi light the inside of the heart and expand 1. Paste into the selection. DO NOT DESELECT.
7. Drop Shadow V & H 1 Op 100 Blur 1 then repeat with V & H at -1. Adjust - Sharpen. Deselect. Reopen the other layers.
8. Find butterfly3. Colorize to match your tube. Resize to 4%. Copy/Paste and rotate left at 45. Place. Drop Shadow V & H Op 70 Blur 15.
9. Find butterfly4. Repeat the above but rotate the item to the right.
10. Find butterfly7 and again repeat but time rotate 15 to the left.
11. Find orangeleaves in the scrap items and resize to 10%. Sharpen. Copy/Paste then position behindthe left butterfiles. Rotate left 15. Duplicate and flip.
12. Merge the two leaves layers together. Drop Shadow at the settings already there. Duplicate and Mirror.
13. Find flower1 and resize to 10%. Place it behind her head to the right and drop shadow.
14. Find flower1_2 do as step 13 but place to the left of her and lower.
These next steps are optional:
15. Find 2tonebrownlace. Colorize it to match the yellow flower but make it darker. I did Colorize 38 and 255. Resize to 15%. Copy/Paste move to the top of the layers. Position at the bottom area of the tag. Drop Shadow with setting already there.
16. Go back to the colorized version of the lace and undo it. Now go to Brightness and Contrast. Use these settings. -83 and -74. Rotate the lace 90. Copy/Paste and move it to position but send to the bottom of the layers just above the background layer. NO DROP SHADOW.
17. Find the swirl item. Resize it to 2%. Brightness and Contrast again. Settings 78 and 19. Drop Shadow and then in your blend mode (found beside where you play with the opacity of a layer) choose soft light.
To finish:
18. Merge all layers, Add your words. I used 2Peas Fancy Free 28pt #e77f3c color in the foreground and #f8e91d in the background. Drop Shadow V & H 1 Op 70 Blur 2 Merge again.
19. Resize to 325 on the largest side, sharpen. Add Copyright info.
Yer done!
Tutorial is written by Nasty Harpy. Scrapkit is provided by Lippy
March 25 '08
All rights reserved by Nasty Harpy
No comments:
Post a Comment