Showing posts with label Purple. Show all posts

Wednesday, October 22, 2008

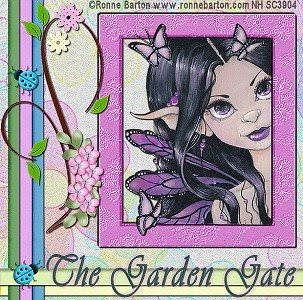
Garden Gate


This tutorial is purely of my own making and any similarities to another tutorials is purely coincidental.

MPT Tou

I used PSP 9 to create this tutorial.

There are no plugins needed

Scrapkit Garden Gate is by Tamara and can be found here

The tube is Ronnie Barton and can be purchased MPT

Supplies:

A tube with some outside images

Tamara's Garden Gate Scrapkit

To Start.

New Image 600 x 600, transparent. Choose the background you like best. Open it and look for it in your patterns palette. It'll be near the top. Floodfill your blank image.

Find the Frame. I used it at its' original size and did DS of H/V 2 (do the -2 as well) Op 100 and Blur 2

Now this was the finicky part. I had to make my tube look as if it was behind the frame, when it wasn't. So I resized it to fit into side the frame then did the DS as above. Make sure to sharpen your tube image. I then Merged down the tube and the frame.

New Raster Layer. Okay now I used my selections tool and drew a long thin shape. I flood filled it with another of the backgrounds. DS H/V 2 Op 80 Blur 3. I did this x2 more times with different colors.

New Raster Layer and using the same tools draw the ones that run along the bottom. I left one on top and the other I moved below. I then hide my tube/frame and background layer then clicked on the first layer and did a merge visible.

I then used the flower doodle and resized it to 70%. I rotated it 90 to the Left. Mirrored it, placed it and then did the DS as on the drawn lines above. I sharpened it too.

I resized the ladybugs and placed them. I did 25% and then 70% resize on them. Again the same DS. I recolored them as well.

I resized the pink flowers to 30% and placed them on the flower doodle. Same DS.

Merge All.

Now what I did was use my crop tool. I stretched it out to exclude all the rough ends of the drawn lines. Then cropped it. This gives the finished product a clean look.

Time for your words. I used the Font Vianta. Chose two colors from your tag I used #29668d and #395434. I did a DS of 1/1 80 1 and then did another of 3/3 (do the -3) 50 5 with the pink from the flowers.

Do your copyrights.

and your done!

Tutorial is written by Nasty Harpy. Scrapkit is provided by Tamara

June 18 '08

All rights reserved by Nasty Harpy
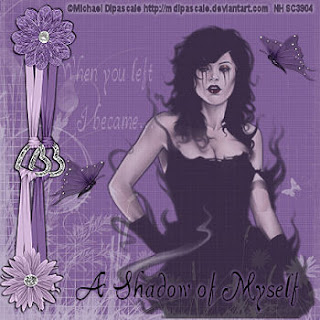
Shadow of Myself


I used PSP 9 to create this tutorial.

MPT Tou

Plugins needed:

None

Scrapkit Lavendarlicious is by Toni and can be purchased here

The tube is by Michael Dipasicale and can be purchased at MPT

Supplies:

Tube of choice

Lavendarlicious Scrapkit

Font is AL Heavenly

To get Started:

Firstly find the paper you like best, reduce it to 55% or so.

Locate the tube you would like to use. I reduced mine to about 80%. Copy and Paste it. Position it where you like it. DS H/V 1 op 70 Blur 2 do the -1 as well. Now take the tube opacity down to about 60, whatever looks good to you.

I used 2 of the flowers, a light one and dark one. I reduced them to 20% and then positioned them where I liked them. I also used both ribbons. Again reducing them to 40%. Position them where you like them. Then close off the layers of your tube and background. Choosing the first layer, do a merge visible. This will merge the flowers and ribbons layer. Now apply the DS as before.

Find your butterflies. I used the darker one. I Duplicated this layer and mirrored it to get the second butterfly. DS the two of these. Place them where you like them.

I then added my lettering. I used AL Heavenly at 18

Don't forget to add your copyright.

Yer done!

Tutorial is written by Nasty Harpy. Scrapkit is provided by Toni

May 27 '08

All rights reserved by Nasty Harpy
This tutorial is purely of my own making and any similarities to another tutorials is purely coincidental.

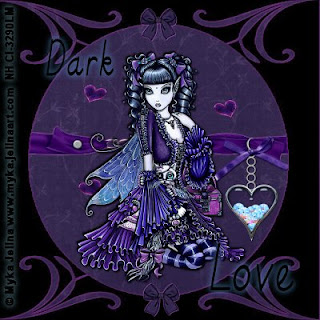
Dark Love


This tutorial is purely of my own making and any similarities to another tutorials is purely coincidental.

I used PSP 9 to create this tutorial.

Plugins:

None

Scrapkit Blackberry is by Lynne and can be found (It is a FREE kit) here

The tube is Myka Jelina and can be purchased CILM

Supplies:

Tube of choice

Freebie Blackberry Kit

Mask 0109M

Font is Block Letters Tryout at 22p


To Begin:

I'm so glad to be able to do a Freebie Kit, thank you Lynne!

Alright .... New Image 600 x 600 and transparent.

Find a paper you ike, I used Dark Floral. Load it up and look for it in your palette under patterns. Flood fill your new image. Name this layer Paper.

Now find your tube and paste it as a new layer. Name this layer Tube. DS V/H 3 Op 100 Blur 5 don't forget to do the -3 as well.

Add a new layer. Now Flood fill this one Black. Layers - Load/Save Mask - 0109M inverted UNCHECKED. Delete the mask layer. It will ask you if you want to merge it, say yes. then click on the group raster layer and merge group. Name this layer Mask.

On your Mask layer. Do a DS but choose a lighter color from your tube. DS H/V 1 Op 100 Blur 2. If you like the look do the -1 as well. You may need to move your tube to fit it.

Find the Ribbon with the chain and paste it, move it beneath the Tube layer. I did the same DS as above with the lighter color #9b52ab.

Find the Filled Heart. Use your Magic wand Tolerance 40 Feather 3 no Anti Alias. Don't grab all the candy pieces just some. I used 141 and 255. Reduce the size place it to the right where the ring on the ribbon is.

Find the Bow and reduce it to 30%. You can place as many of these as you like. I did a DS with the lighter color from my tube both the 1 and -1. I also did a sharpen on the bow.

Find the Heart tube you like best. Reduce it to 20%. Paste it to your image. Place as many of these as you like. Mirror a few. Now merge the little heart layers so they are all one. On your Layers list where it says Normal (this is the blend mode). Choose Hard light. You can play with the others there if you like, that's the one I chose.

Well it's time to merge the whole thing. Merge All.

Time to add your Copyright Info.

Add your words

We're done!

Tutorial is written by Nasty Harpy. Scrapkit is provided by Lynne

May 08 '08

All rights reserved by Nasty Harpy