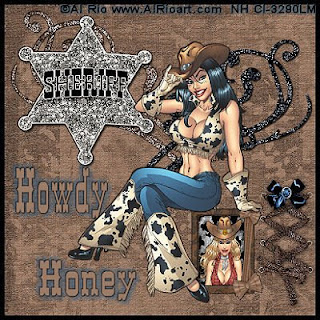
This tutorial is purely of my own making and any similarities to another tutorials is purely coincidental.
I used PSP 9 to create this tutorial.
Plugins:
Cow Chips is by Toni and can be found here (It is a FREE kit)
The tubes are Al Rio and can be purchased CILM
Supplies:
Tube of choice
The tube should be one of a sitting subject.
Find another with a good head shot.
Okee Dokiee Pilgrims! Here we a-go!
First, open a new image 600 x 600. Then open the paper you like. I chose the lighter one. Go to your palette and find your paper in the foreground. Copy and paste it into your new image. You can close it now.
Now for the tube. Paste it into your new image, resize if you need to. Then DS on it. v/h 1 op 70 blur 2. Do the -1 as well.
Now I saw this little filly sittin' there and she needed sumpin' to be sitting on, so I went and got the single frame and resized it to 40%. You may need to go larger or smaller depending on your tube. Make sure the frame is placed the beneath the tube. Remember to sharpen it.
Okay time for the Sheriffs star. I placed it at it's original size then positioned it. Then I reduced it to 60%. You may like it bigger or smaller. I Sharpened it x3 to bring the sparkle back. Same DS for this one.
Next go get the doodles. I reduced these down to 60%. I placed the darker one behind the tube, and the lighter one behind the Star. Make sure to Sharpen them and DS.
Now choose the layer with the frame on it, and with your magic wand click on the inside. I then when to the selections - modify and expanded it by 2. Now add a layer. Choose the paper you like for the background and find it in your palette. Fill the inside of the frame. Okay another new layer.
Choose another tube with a good head shot. Use your crop tool to crop the tube down to just the head of your tube, do your DS on it, then copy it. Return to your frame and the new layer you added. Do an edit into Selection. Selections none.
Add a new layer, and choose a font you like. I used West.ttf. Choose colors in your palette that compliment your tag. I did the DS. I then did another DS V/H 5/-5 Op 70 Blur 10. I used a color from my tube.
I found a ribbon and recolored it to my colors. I then reduced it to 20%. I then did a DS. I found the lacing and reduced it to 40% and placed it below the bow. DS.
Well it's time to merge the whole thing. Merge All.
Time to add your Copyright Info.
We're done!
Tutorial is written by Nasty Harpy. Scrapkit is provided by Toni
June 15 '08
All rights reserved by Nasty Harpy
No comments:
Post a Comment