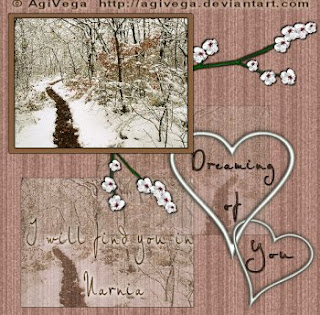
This tutorial is purely of my own making and any similarities to another tutorials is purely coincidental.
I used PSP 9 to create this tutorial.
Plugins needed:
Scrapkit Apple Blossoms is by Lippy and can be purchased here
The image is AgiVega's work, she requires an email to ask permission, but is very sweet and so thrilled when approached..
Supplies:
Tube of choice
Font is AL Charisma
To Begin:
Open a new image, 600 x 600 transparent.
I used the Paper 8 and use the pixel to resize it. I chose 600 x 600 so that the quality was good. Copy and paste is as new layer. I deleted the blank bottom layer.
Choose your image. I took mine down to 300 on the longest side. Duplicate it twice. Close off these two layers for the moment. DS H/V 2 Op 80 Blur 3 Black repeat with the -2. Name this layer Original.
Find the Branch 1. I took it down to 400 on the longest side and rotated it 90 right. Copy and Paste then place on the right side underneath the image. Duplicate this layer and rotate it 70 to the right. Then place at the bottom of the image. DS as above. Merge the branches. Name this layer Branches
Click on the Original layer. Close off all of the layers but this one. Add a new layer and move it beneath your Original layer. Use your selection tool, it's one of the options listed in the same place as your magic wand. Rectangle and 0 Feather. Draw a rectangle around your image leaving enough space outside to make a frame around your image. Flood fill inside the square on this layer, choose a color from your image. Name this layer Frame
Deselect and choose your Original. DS 1/-1 80 and 2 with black. Merge visible the Original and the Frame Layers. Name this Framed. DS this layer using the same settings. Open all the other layers but the duplicated image ones. You will need to move the Brances layer below the Framed layer.
Okay now open the duplicated images and choose one. You may have to block off the Framed Layer to see them. Pull one down and to the middle of the canvas. Slip it below the Branches Layer, drop this layer opacity to 48. Grab the other duplicated layer and slide it down to the bottom left. Drop the opacity to 48. Move it below the first duplicated image. Merge Down these two layers and name it Duplicated.
Find the Hearts tube. I reduced it to 10%. I also colorized it. a greenish hue. 78 and 13. Place on the canvas and position where you like it. DS.
I used the Font AL Charisma at 24. The colors are Black and #89613e. DS using settings already there. Do not use the -1 settings.
Now I reversed the foreground and background colors by clicking on the little switching arrows in the upper tiny boxes. Write the words you like, and DS but this time 1/-1 80 10 with WHITE.
Merge flatten.
Crop the Tag to get rid of excess space. Sharpen.
Apply your copyright information.
I resized to 350 p and used Export jpg at 15%
We're done!
Tutorial is written by Nasty Harpy. Scrapkit is provided by Lippy
May 2nd '08
All rights reserved by Nasty Harpy
No comments:
Post a Comment